Easy steps to deliver Virtual Excursions

Learn from Australian experts in online engagement on how to deliver Virtual Excursions. Find out how to set up your space and use the right technology for your programs. Create professional, successful, engaging session for your audience.

Worried about being on video?

More people than ever before are doing live videos and things don’t always work out perfectly. No one expects perfection. Being relatable and real is more likely to help endear your audience to you. Practice makes perfect – try it out on your friends, family or colleagues and be open to feedback.

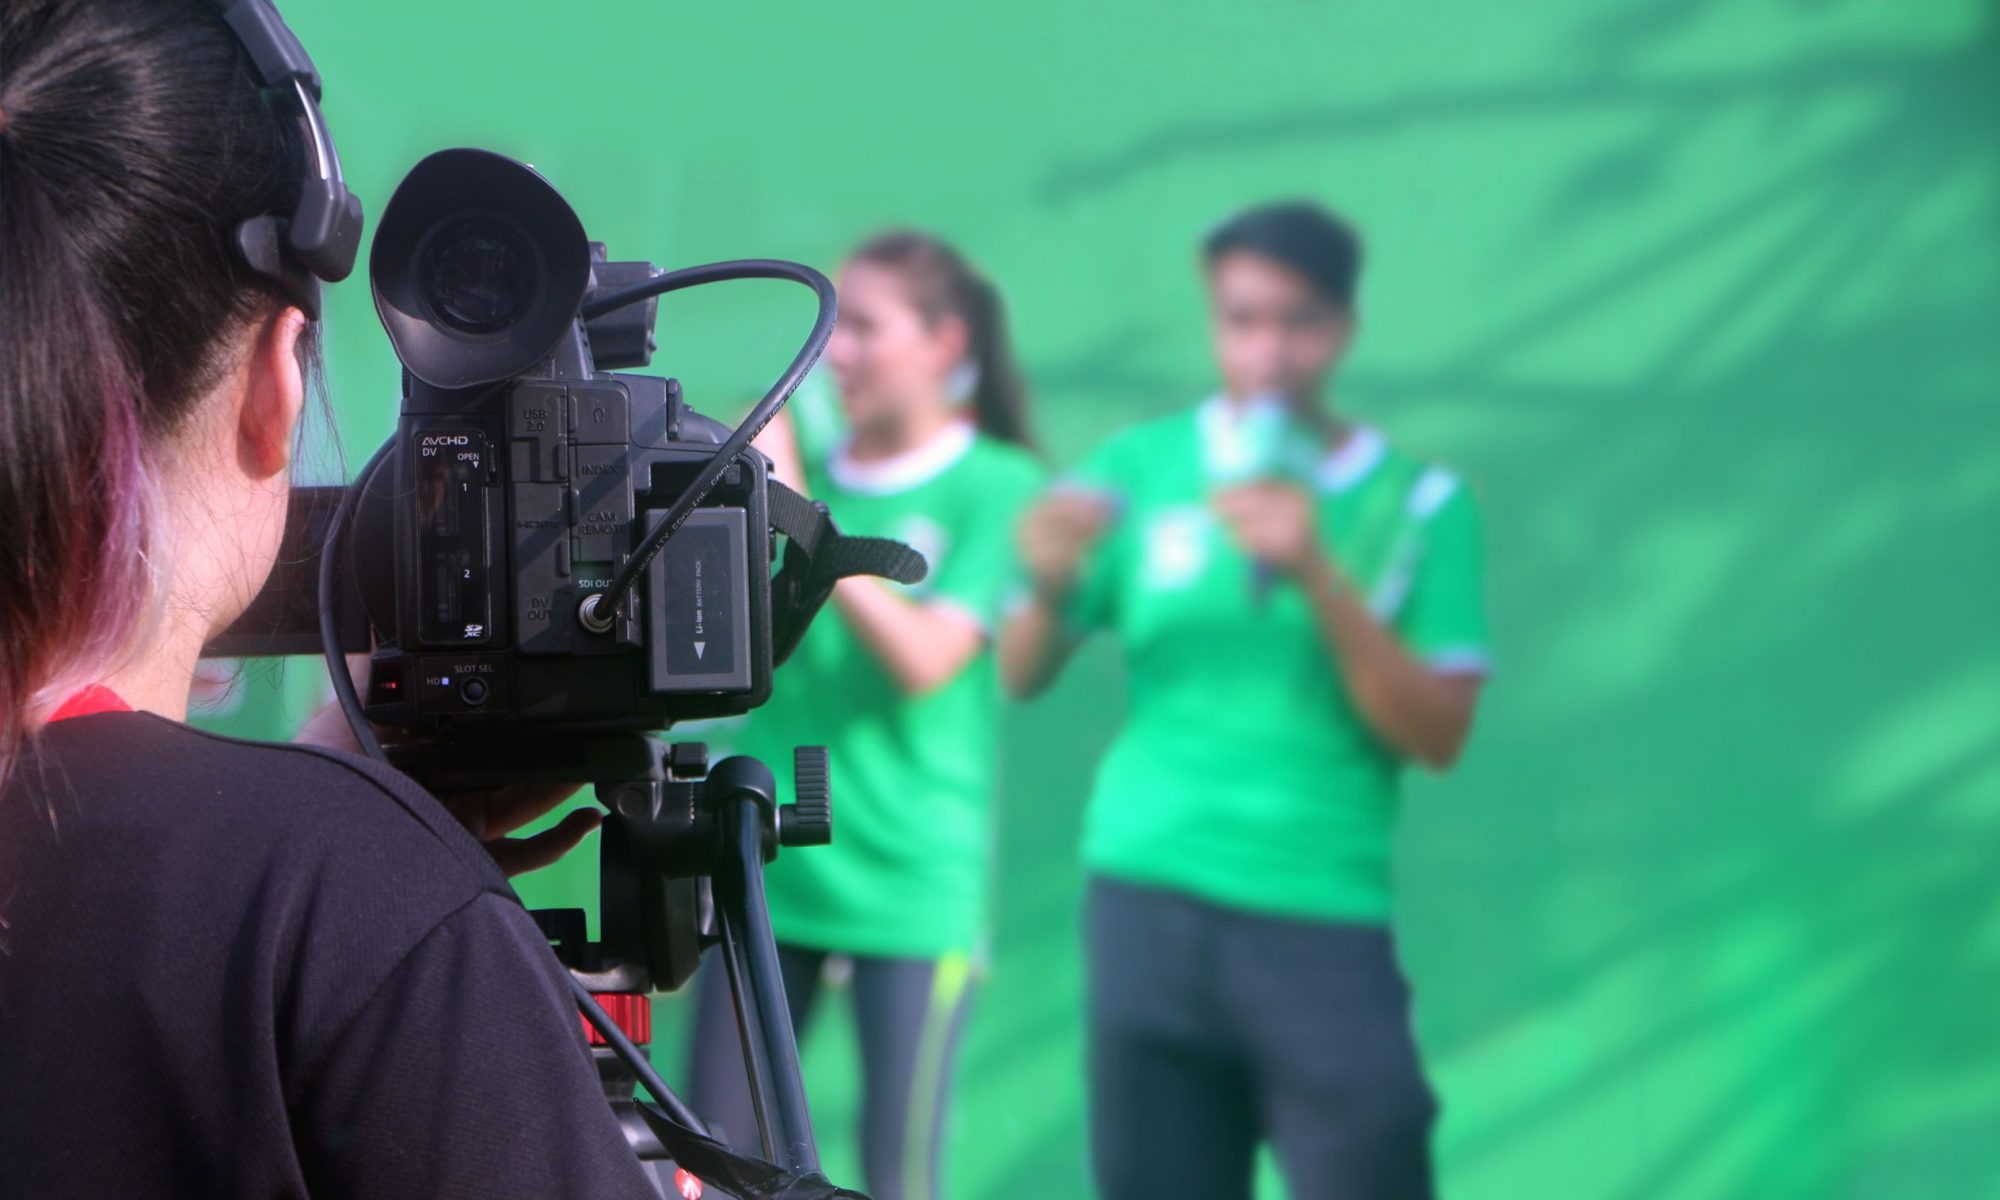
Find out about the importance of audio, video and lighting with Stephen Bancroft from RVR Media.

Where to start?

Choose a web software platform that works for your audience. Think about your own capacity to manage and host people online, and how you want to manage your audience interaction.

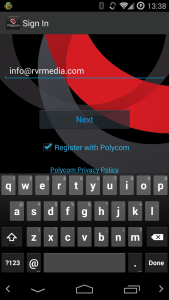
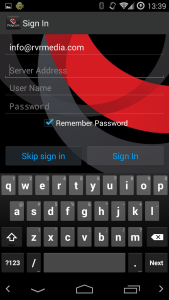
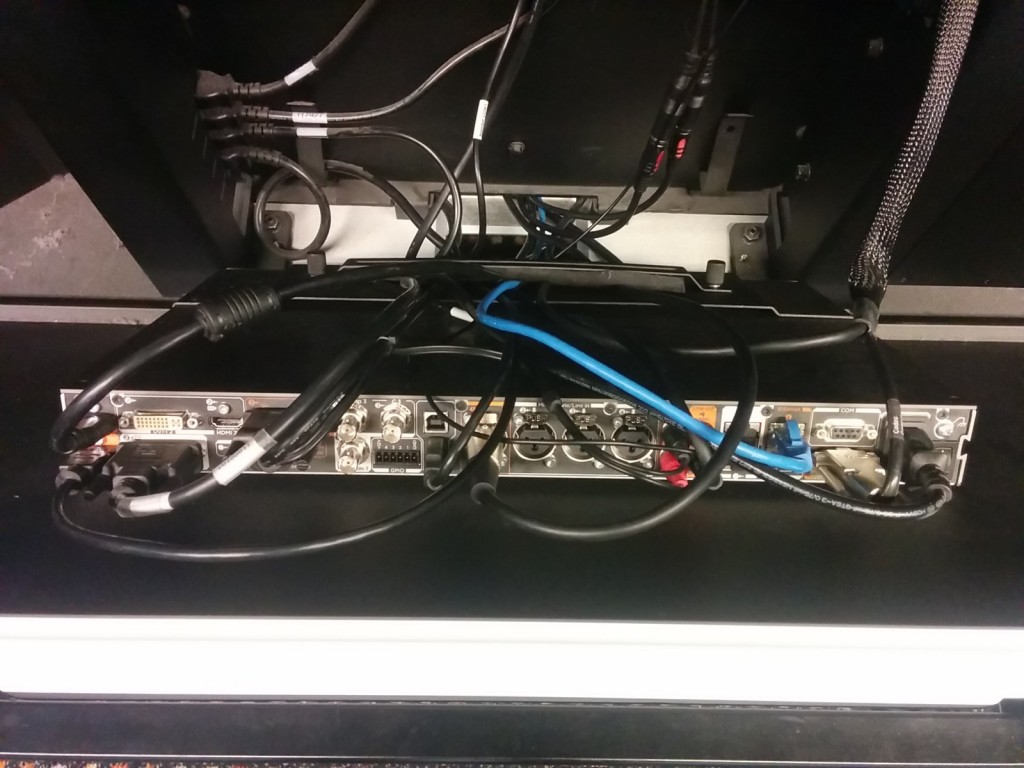
Check that your chosen application or software connects with your A/V technology and won’t be blocked by internet security or firewalls.

Use easy timezone conversion tools, consider when people will most likely participate and put date and time information together for example: Monday 5 June, 16:00 AEDT.

Cameras: Will you have more than one? Ensure your video system connects with a good audio system. At least have a good quality USB camera with a built-in decent microphone and consider a light. Consider a versatile videoconferencing camera with pan tilt and zoom. A lot of the great camera work is about good set up – making sure the camera can focus, and setting your room up with interesting props that you can use as an alternative to ‘talking heads’.

Audio: If you’re doing a webinar, the audio may be good enough on a new laptop. Next level up: a headset microphone or a good Bluetooth microphone. Reduce echo where possible, for example with soft furnishings.

Check your network and internet: Make sure your internet is fast and reliable. An ethernet cable connected to a computer is always better than WiFi. Reduce the amount of internet being used during the conference by turning off Netflix, YouTube or other similar high-bandwidth heavy applications during your session.

Type ‘speed test’ into Google to run an internet speed test that will identify any site issues. If you have a video conferencing system, their diagnostics will allow you to look deeper into the speed of the data and as well as data loss.

Do technical checks on everything days before. If you’re using video conferencing, use a Videoconferencing Test Site service. On the day, log on early to test everything. Have a backup if everything fails for example an email or social media post drafted ready to send. Ensure speakers are aware of the backup plan.

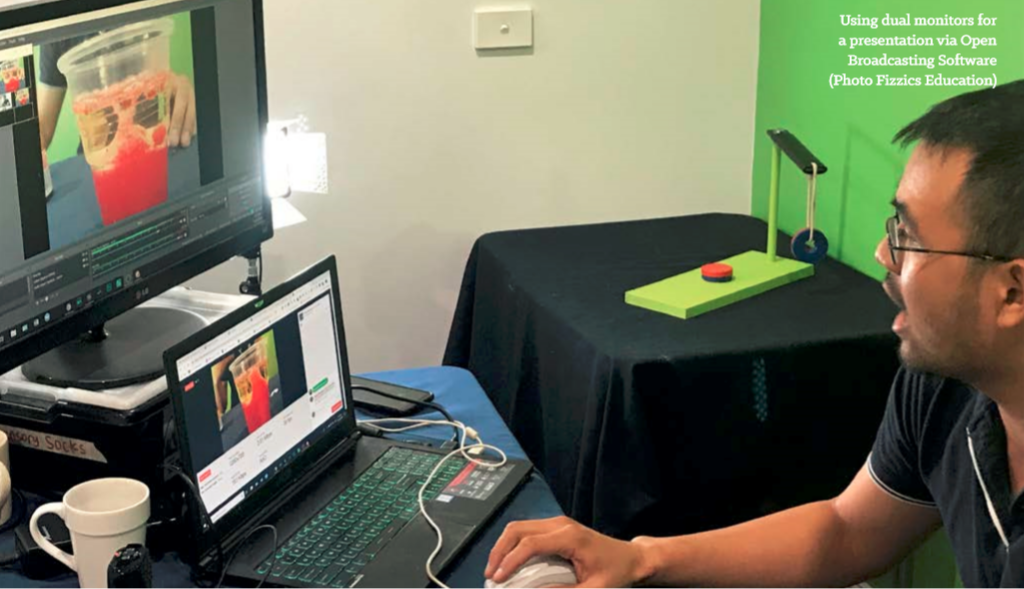
Discover what you can do to create a great space for delivering virtual excursion with Karen Player from Australian Environmental Education

Online delivery essentials

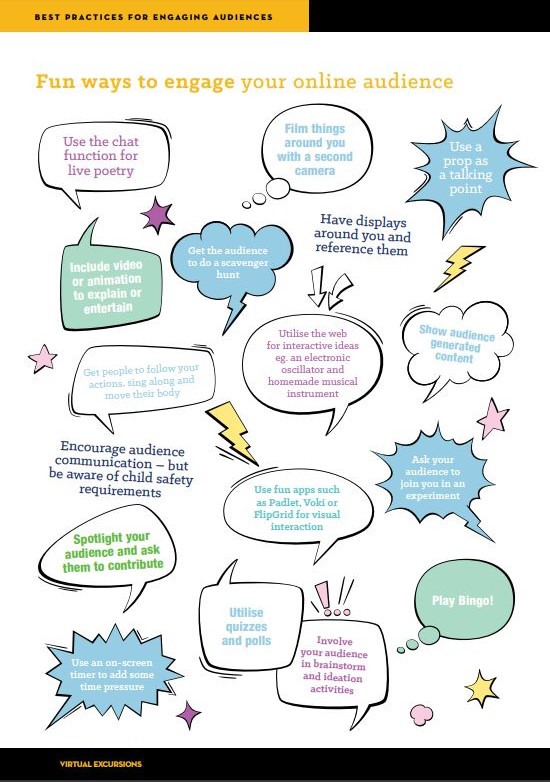
Use this as your checklist to help deliver engaging Virtual Excursions.

Have a clear strategy: Know who you are talking to, what they might enjoy (you can always test and adapt), and what you are trying to achieve.

Develop an effective content and delivery plan: What are you going to present? How will you make and keep it interesting, at the right comprehension level?

Check your visuals: Everything from the speaker and their background to what you want to show your audience.

Check your audio: ensure you have good quality voice amplification, any external audio set up, and avoid annoying background noise.

Set up safe, reliable online environment: This is about ensuring that the technology works and that you establish good practice.

Record your event: Even if you don’t share publicly, by reviewing your work you’ll get better. And if you do share it out you’ll have bonus data on your audience.

Make sure you have a plan, you have tested your equipment and done a practice session and remember it is OK to make a mistake.

This content originates from Web Conferencing 101 Essentials training. The Virtual Excursions training package was coordinated for national delivery by Inspiring Australia NSW. It was produced and delivered by Fizzics EducationSydney Science Education and Refraction Media with support from the NSW Office of the Chief Scientist & Engineer and state Inspiring Australia programs in NSW, ACT, QLD, WA and SA.

Engaging Audiences

Discover some great ideas to engage your audience online. Remember engaging event involves more than watching a talking head. Plan ahead, know your audience and what you are trying to achieve. Use your passion and content knowledge to get the best out of your programs. Make the most of your resources and props and don’t forget to use these fun engagement ideas.

Fun ways to engage audiences online Heather Catchpole from Refaction Media

The Virtual Excursions training package has been coordinated for national delivery by Inspiring Australia NSW. It was produced and delivered by Fizzics EducationSydney Science Education and Refraction Media with support from the NSW Office of the Chief Scientist & Engineer and state Inspiring Australia programs in NSW, ACT, QLD, WA and SA.

What technology should I use?

In the last Virtual Excursion Australia meeting we were discussing what type of system or technology should I use to deliver virtual excursions? The answers were varied and depend on what was being delivered, talking head presentation or multiple camera production. Where the audience was also a consideration as it determined what technology the content was able to be received on.

zoom-vs-vc

We have 3 different Virtual Excursion Australia content providers sharing their ideas.

Ben Newsome from Fizzics Education uses H.323 Polycom or Tandberg codex for video conferencing either direct IP to IP call or through a bridge like DART Connections, Electroboard or CILC. A H.323 for video conferencing codex is required at the other end to receive this content.

An alternative used by Fizzics Education is connecting by Polycom Realpresence or Zoom for web conferencing. Web conferencing is a software based option that is contained entirely in a web browser making is cheaper and easier to access for casual use.

Fizzics Education also uses an iPad connected via an A/V cord as a document camera.

Anne Doran from the Australian National Maritime Museum uses a H.323 for video conferencing codex for their interactive sessions. Youtube live streaming has been used for big events. Live streaming extends the life and reach of the presentations as they were hosted on the Department of Education You tube channel for a period of time after. A twitter back channel and email was available for questions.

The Australian National Maritime Museum will continue to use YouTube live for offering selected programs as a resource to high school students and teachers as it is a difficult audience to schedule programs with. YouTube offers flexibility for teachers to view the program either live with the twitter/social media back channels or at a time suitable for them.

Karen Player from the Australian Museum also uses a H.323 video conferencing codex for their interactive sessions. This allows them to set up different camera angles and to send PowerPoint presentations to the far end. The Australian Museum has recently run a successful session with Sydney Distance Education through Zoom and they will be exploring more web base technologies in the future to provide schools with more flexibility

The Virtual Excursion Australia conference in 2015 was a great example of how to integrate these technologies. We were able to have the Australian Museum in Sydney and AMCI in Melbourne connect using H.323 video conferencing codex’s though the AARNET bridge and live stream the combined output using a link embedded on the Virtual Excursion Australia website.

What is a Tricaster ?

In the rapidly evolving landscape of digital media production, the TriCaster remains a cornerstone technology for multi-camera video production. Now a flagship product within the Vizrt ecosystem, the 2026 iteration of the TriCaster has transitioned from a standalone “switcher in a box” to a sophisticated, software-defined media platform. This guide outlines the core capabilities, technical specifications, and architectural shifts that define the TriCaster in 2026.

The Vizrt Integration: A Unified Ecosystem

Since its full integration into the Vizrt brand, the TriCaster has moved beyond simple vision mixing. It now serves as a primary node within the broader Vizrt workflow, offering native interoperability with industry-standard tools like Viz Graphics and Viz Mosart. This transition ensures that TriCaster users have access to the same high-end toolsets used by global broadcasters, scaled for environments ranging from corporate studios to international live events.

Connectivity and Transport: NDI 6+ and Beyond

The backbone of the 2026 TriCaster is NDI 6+. This version of the Network Device Interface protocol brings several critical advancements to the platform:

  • 10-bit HDR Support: Native processing of high-dynamic-range content ensures visual fidelity meets modern cinematic and broadcast standards.
  • Integrated WAN Capabilities: The TriCaster now handles remote production natively. With NDI’s enhanced Bridge features, users can ingest sources from across the globe over standard internet connections with minimal latency and simplified encryption.
  • Unified Metadata: Enhanced metadata handling allows for better downstream automation and asset management.

Hardware Standards for 2026

While software-defined, the physical hardware underlying the TriCaster line has been updated to meet current high-bandwidth demands. The 2026 models feature:

  • Standardized 4K/60p: Ultra-High-Definition at 60 frames per second is now the baseline for all internal processing.
  • 12G-SDI Connectivity: For environments requiring traditional baseband video, 12G-SDI ports provide single-link 4K throughput, reducing cable complexity in on-premise racks.
  • PCIe Gen5 Architecture: High-speed internal bus speeds ensure that even the most complex multi-layer M/E compositions are processed with zero dropped frames.

AI-Driven Automation and Intelligence

The 2026 TriCaster leverages AI not as a gimmick, but as a functional tool for production efficiency. Through integration with Viz Connect and Viz Mosart, the system offers:

  • Automated Scene Orchestration: AI-driven “virtual operators” can handle routine switching tasks based on audio cues or facial recognition, allowing human directors to focus on creative storytelling.
  • Dynamic Resource Allocation: The system intelligently manages CPU/GPU loads, prioritizing critical program feeds during high-complexity segments.
  • Enhanced Viz Connect Integration: Streamlining the ingest of non-traditional sources (mobile devices, web streams) by automatically normalizing formats and frame rates using AI-based upscaling and temporal interpolation.

Hybrid Deployment: Cloud and On-Prem

Flexibility is a core requirement of modern production. The TriCaster is no longer tethered to a physical chassis.

  • On-Premise: Traditional hardware appliances for high-reliability, low-latency local production.
  • Cloud (Virtualized): TriCaster software can be deployed in AWS, Azure, or private data centers, allowing production teams to spin up powerful galleries anywhere in the world.
  • Hybrid Workflows: Live productions can now split the load—keeping heavy 12G-SDI ingest on-site while offloading graphics rendering and streaming distribution to the cloud.

Conclusion

In 2026, a TriCaster is defined as a Vizrt-powered, NDI-native, AI-augmented production hub. It bridges the gap between traditional broadcast reliability and the flexibility of software-defined networking. For technical directors and broadcast engineers, it represents a scalable solution capable of delivering 10-bit HDR content across both local networks and global WANs.

Stephen Bancroft is an an Electrical Engineer and Computing expert, he has over twenty years experience with internet based technologies and has worked extensively with live sound and broadcast. He is currently writing technical articles exclusively for VEA.

Zoom Video Conferencing

ZOOM VIDEO COMMUNICATIONS LOGO

Recently there has been a bit of excitement in our community regarding using Zoom Video Conferencing as a gateway to reach potential audience that may not have invested in a full suite of Standard Based (H.323) v/c kit. Think of Zoom as Skype on steroids! You can set up a meeting, invite guests, and have them connect simply through their browser. There is no complicated software to install and everything works through the browser without having to install additional software, which is great for companies which have restrictions on such things.

On of the most exciting things for us is that Zoom is free, so anybody you invite to a meeting can use it. And the fact that they provide what they call a H.323 Room Connector. This optional extra can be purchased for a small price of $US49/mo and enables H.323 video conferencing units to join the meeting. Which finally means that we can connect all our v/c units and users together in one big conference!

This all sounds fantastic but there are a few caveats that you should be aware of. Firstly you need to know that DART has (for the moment) put a ban on using Zoom to dial directly into their system. The main reason for this is that the connection that Zoom creates is forced to a connection speed of 6 megabits per second. This is far to fast for DARTs front end points and causes congestion and high usage, resulting in poor experience for other users on the network. To work around this you will need to dial directly into Zoom using your H.323 device so as a result means that it is unusable with DET schools as you need to use DART to connect to them. However as you will read I have been able to work around this using two H.323 devices.

Secondly, unless your guest using the H.323 room connector and a standards based v/c unit, then they will be using their computer which mean they will also be using the webcam and microphone which is included. Generally these built in devices are fairly cheap and are designed to work with just a single person not an entire room of people, so depending on your application the results not be acceptable.

If you really want to take full advantage of what Zoom has to offer you can configure a set up in which you use two H.323 units and a video switcher such as a Tricaster. To do this you would dial the first H.323 unit into DART as you normally would and the second unit would dial into Zoom. In this scenario any schools you need to engage would be connected at the DART end and any ‘special guests’ could be connected to Zoom. Exactly who sees what is controlled by the vision switcher. However, doing this requires quit a bit of technical know how! I have personally done this with a video conference at The Powerhouse Museum and the results where similar to that of a TV broadcast. You can see for yourself HERE.

Is Zoom worth the investment ? Probably….. for $US49/mo I think it’s worth at least trying out, you may find that you have no use for it or your organisation does not have the technical ability for it, but you would not have lost much in doing so. But you may also find that your audience reach has been massively extended and the return will be far greater than the small investment.

Stephen Bancroft is an an Electrical Engineer and Computing expert, he has over twenty years experience with internet based technologies and has worked extensively with live sound and broadcast. He is currently writing technical articles exclusively for VEA.


Dialling H.323 from a mobile device.

Ever wanted to join in a video conference (H.323) from a your phone or tablet? Well it is possible. Start by installing the Polycom RealPresence application for Android or iPhone. Start the application and you should be greeted with a screen similar to this. I am using Android 4.4.4 so your screen may look a little different.

2015-03-23 02.38.54

At this point just enter your email address and click next. Now you will get the following screen.

2015-03-23 02.39.05

At this point you would be forgiven for thinking that you need to sign into some sort of Polycom server or infrastructure, but you don’t need to, just click ‘Skip Sign In’ and you will get this screen.

2015-03-23 02.39.39

Now your in business, you can enter a H.323 IP and dial directly. Test it out your self by dialling one of the VTCTEST numbers.

2015-03-23 02.43.44

Enjoy !


Stephen Bancroft is an an Electrical Engineer and Computing expert, he has over twenty years experience with internet based technologies and has worked extensively with live sound and broadcast. He is currently writing technical articles exclusively for VEA.

Get roving video conference robots at your school or museum!

There has been much talk around the video conferencing robot at the National Museum of Australia. Developed in collaboration with the CSIRO and the Department of Broadband, Communications and the Digital Economy, the telepresence robot roving the NMA’s floors has allowed multiple remote schools and libraries to simultaneously connect to an onsite educator to ask questions as well as explore the exhibits themselves using the panoramic cameras that create a 360 degree view with zooming capability. The only issue is that whilst the technology is very exciting the associated price tag makes it difficult for other sites to attain easily.


Double Robotics
Double Robotics iPad robot seen in Atlanta at ISTE 2104

There are low cost options that have been roaming educational halls and hospitals for years and represent an exciting way to scale the concept for Australian needs. During my Churchill Fellowship tour I came across a couple of these solutions and was very impressed with how easy they are to operate and the attainable price for implementation. The New York Hall of Science uses a VGO robot as a way for remote learners to interact with summer science camps occurring within the galleries. The learner is able to log onto the robot and control its movement, effectively acting as an autonomous student. There are other models available too; a popular one in schools is the one from Double Robotics that is effectively an iPad rolling on a small version of a Segway. In both cases these VC robots have found uses in hospital systems for bed ridden patients to provide virtual mobility as well as in schools for remote students to participate in lessons. The remote site simply downloads an app and controls the robot from their location. The result is the ability of a remote student to move around the school or similar and interact with classes… not unlike ‘Shelbot’ seen in the Big Bang Theory comedy series! At Fizzics Education we had a Double Robot roaming around our offices for a bit… even my 5 year old daughter was able to control easily although it did freak out my two year old when she moved it towards him 🙂

Schools have been using these systems to allow sick kids still attend classes, even for students to present their oral presentations to their class whilst on an excursion. The technology also be used as a way of giving visitors a virtual tour of your site before they even step foot on your grounds – as a former boarding school student I reckon this also presents an interesting possibility for families looking to get an idea of where they are sending their kids! Regardless of how you look at it, these robots and other similar products add yet another dimension to an already exciting field for distance education!

How to deliver virtual excursions

At the last Virtual Excursions Australia meeting discussions came back to some of the fundamental questions about becoming a content provider.

  • What equipment do I use?
  • Should we charge for our sessions?
  • How much should we charge?
  • How can I make sure my sessions interactive?
  • How many students or classes can be involved in a session?

The difficulty with most of these questions is that there is no right answer and depends on your organisations content, audience and purpose.

However these guideline will help you make an appropriate decision for your organisation.

Equipment

In resent years there has been a move away from hardware equipment like H.323 video conferencing equipment, to software based solution like Zoom, WebEx and Skype.

In terms of equipment the next questions is do I install a fixed unit or a portable unit on a trolley. A portable unit gives you the flexibility to move spaces; into a different office or classroom or even into a gallery or exhibition space. This is also a useful option if you have competing programming demands on your space. However a fixed unit can reduce your set up and pack down time and allows you to create a themed space.

I used a fixed unit for these session at the Australian Museum in the Australia’s First People’s education room and it creates an amazing atmosphere.

Derek from the Australian Museum presenting the Totems workshop


For other sessions I used our mobile unit which allows me to get close to some of our incredible specimens.

Karen form the Australian Museum presenting Giants from the past

To Charge or not to Charge?

The question of charging also varies; some organisation are mandated to deliver free programs, other have to cover additional staff costs and therefore have to charge. Projects that have been developed with grant funding will usually be free during the funding period.

Currently in Australia session prices range from free up to $350 for the high end unique experiences. You can see that there is a big variation and cost recovery is something to consider when setting prices. I believe offering a range of free and charged sessions is a good option and provides the greatest opportunities for schools to connect with your organisations content.

Remember if your content is high quality schools will pay to connect with you, free session also don’t automatically book out.

The other challenge we discussed at the meeting was the issue of schools booking a place in your session and not showing up. This seems to be more common when sessions are free. Some content providers find that if there is a small charge on their session instead they get less no shows. This is something to consider and trial.

Interactivity

There are many different ways to make a video conferences interactive and you need to find options that work for your content. I’ve created a list of a few different options you can try.

  • include short activities
  • incorporate actions or movement
  • have group answers eg. get everyone to answer simple questions together
  • create artworks during the session
  • run experiments
  • include a quiz
  • leave plenty of time for questions

There are many other ideas but this list is a start. You can also combine options depending on the type of session you are running.

How big should I make the session?

This depends on the type of session you are running. If you want a detailed discussion with an expert, then  1 or 2 classes is appropriate. If you have a special high profile guest, then you will want to open up the bookings to multiple schools. If you have over 10 schools try using Twitter or a messaging channel to get questions in, this will make the session feel more interactive without disrupting the flow.

I generally limit class number to 4 – 6 schools for the sessions I deliver. This has been determined over the last 5 years of delivering programs. However we limit the numbers of schools when we have designed sessions with more discussion.


I hope this information helps you get started and Virtual Excursion Australia content providers are happy to help out if you want more information.


Video Conference Checklist

We’ve all been there, you nervously start a video conference hoping that all your equipment works, praying that no one has snuck in and played around with your Tandberg settings in the dead of the night while you weren’t there. You dial the VMR number and ask the magic question… ‘Can you hear me ?!?!’, you hold your breath and never get a response….. booh…. you find yourself on the phone with the remote end for the next twenty minutes trying remove the gremlins that have crawled into your system rather than delivering the fantastic educational experience that you had so meticulously planned.

[pullquote align=”right” textalign=”center” width=”30%”]…you can always have a v/c without the picture, but you can’t have one without the sound![/pullquote]

Wouldn’t it be better if you could just start the video conference and everything just worked straight out of the gate ? There is a way to achieve this, and it can apply to setups of any size and any type and any organisation. I call it a ‘pre-flight check’.

The basic idea of a pre-flight check is to do technical checks on everything BEFORE you start the video conference. Granted most of us delivering video conferencing are not technical and very few of us have the luxury of having a technical person on standby to help with the set up. So it will pay you greatly to spend a few minutes before an event doing some basic checks on your equipment. Even if you know the state of your gear or your gear has not moved it is still a good idea to check everything is working just so you can eliminate your end as being the problem if an issue does crop up it’s ugly head during your event. Following is a checklist that has been implemented at the Powerhouse Museum, since we have started this process we have had very few technical problems and we have also found that our staff are more confident and know the equipment better as a result.

[important]

1. Check Your Network

Check that you have an IP address. On a Polycom unity The IP address is shown at the bottom of the display when the unit first boots up. On a Tandberg you will see the IP on the top left. An IP address has the form nnn.nnn.nnn.nnn, If you do not have or cannot see an IP address try switching to another network port or talk to your network administrator.

[/important]

[important]

2. Check Your Primary Camera

Check that the primary camera is plugged into the correct port and you are getting a loopback image on the screen.

[/important]

[important]

3. Check Your Secondary Camera

If you are using a secondary camera, switch over to it and check that you are getting a loopback image.

[/important]

[important]

4. Check Your PC

If you are planning to use content sharing from an external PC, then you MUST check that it is working beforehand. There are several things that can go wrong here! Make sure you are familiar with the ins and outs of switching your computer from mirrored or extended display modes and check that you have all the right sort of connectors available to connect to your v/c codec. Exactly how this done is something that I can save for another article….

[/important]

[important]

5. Lighting

This seems like an obvious one, but you should keep in mind that a camera does not perceive light exactly as the human eyes does and low light levels can translate into a fuzzy or graining looking image at the remote end. Conversely high light levels can cause the image to look grey or colourless. Critically review the lighting and check via camera loopback that the lighting is not too dark and not washed out. There should be a nice contrast between each half of the face and skin tones should look natural for onscreen talent.

[/important]

[important]

6. Make a Test Call

Once you have tested the above make a test call to another v/c unit, and test everything again from steps 1-5.

[/important]

[important]

7. Test the sound

Finally, while on the test call confirm that there is two way audio. The sound should be loud and clear and not distorted. Remember you can always have a v/c without the picture, but you can’t have one without the sound!

[/important]

Some v/c setups are easier then others.
Some v/c setups are easier than others.

Another good idea is to use a service like VTC Call Back (http://vtctest.pointsofdata.com/) Using this you can make a test call and it will call you back and check your video and audio is working.

Try to plan the time it takes to do this into your event schedule, I would recommend that you allow yourself at least 15 minutes for the basic checks written above, longer if you have a more complex setup. If you make a good habit of running through this before every event you will save yourself a lot of heartache in the long run.

Keep up the good work !

Stephen Bancroft is an an Electrical Engineer and Computing expert, he has over twenty years experience with internet based technologies and has worked extensively with live sound and broadcast. He is currently writing technical articles exclusively for VEA.

Tandberg URI Dialing

Recently I had some fun and games with our two Tandberg Video Conference units at the Powerhouse. It had been report to me that it was not possible to dial into any VMR’s (Virtual Meeting Rooms), DARTs VMR’s included. To dial into a VMR it is necessary to use what is known as a ‘URI Dial String’, this string consists of two parts, firstly some text or a number followed by the ‘@’ symbol then an IP Address or Domain name so,  <text>@<ipaddress>, this is typically implemented by inputting the VMR as the first part of the string then the IP address as the second part.

As you would imagine not being able to dial into the DART VMR is a big problem for us, and since I am still relatively new here I am not really sure how this was achieved in the past, but I set about fixing the problem, and after much back and forth and much googling I came to the conclusion that the firmware in our Tandberg units was way too old!

As it turns out URI dialing cannot be used with Tandberg software version prior to TC4.2 unless the system is registered with a gatekeeper. We do not have a gatekeeper and you would only really need one if you had to implement inbound URI dialing. Cisco only introduced full support for H.323 Annex O (URI Dialing) in TC4.2, we had TC4.1 so could only do IP dialing. Problem is that we do not have a CISCO support contract on our VC units and getting firmware upgrades is usually done through support contract channels.

Tandberg C60 at the Powerhouse

Thankfully, if you are in the same situation, there is a way out. You can either go to the trouble of installing gnugk a free gatekeeper application on a seperate server or you can in fact get a firmware upgrade for your unit. CISCO only require that you have a support contract to get the most recent version of the firmeware TC6.3, the older versions TC4.2 and TC5.1.8 are freely avaliable HERE.  You will need a CISCO Tac login to be able to download it, but that is free as well.

There is a step-by-step process to installing a new firmware package in the administrators guide for your system. But basically you will need to;

– Download the package.
– Upload the packaged to the unit using the web interface that your unit provides.
– Wait about 10 minutes for the upgrade to finish and the system to reboot.
– Login to the CISCO Tac and obtain a Release Key from HERE.
– Login back into the web interface and apply the ‘Release Key’ from the maintenance menu.

Be warned though, a firmware upgrade like this is not for the faint hearted, things can go wrong, and if something breaks you will need advanced knowledge to recover from the situation!

So, if you’re brave, go forth, upgrade and enjoy all the new features that you never thought your VC Codec could do!